Servicing your own graphics card might seem simple—remove the cooler, clean it up, add new thermal paste, and reassemble. But at ZapFixers, we often receive GPUs that stopped working right after owners tried to service them at home. The truth is: modern GPUs are fragile, and one small mistake can render them unusable.
The #1 Reason: Knocked-Off Components
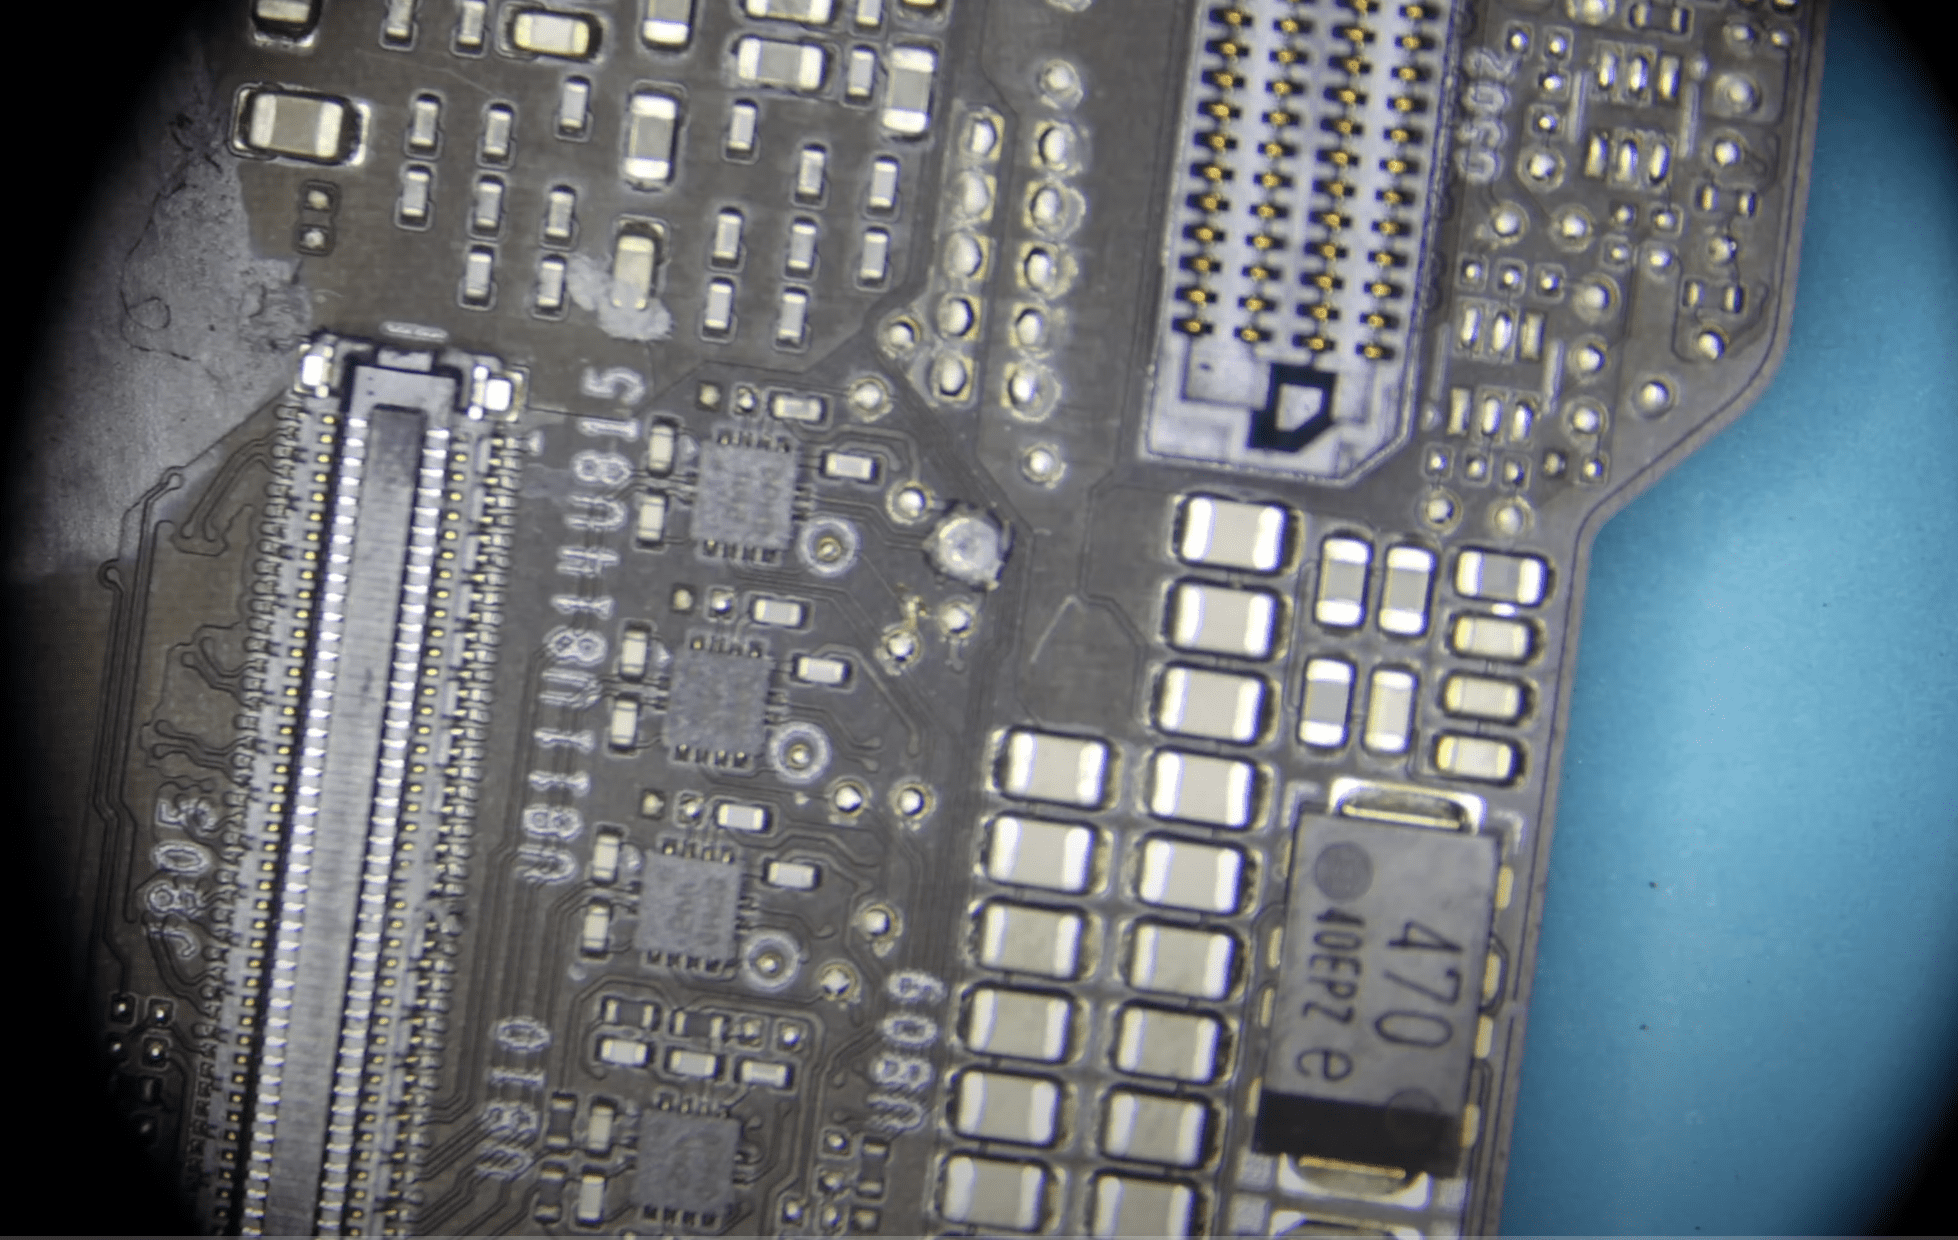
The most common issue we see is knocked-off surface-mounted components. Graphics cards contain thousands of tiny capacitors and resistors—some smaller than a grain of sand. During disassembly, cleaning, or reassembly, it’s very easy to:
- Accidentally scrape off a component with a tool
- Knock parts loose while removing the cooler
- Apply too much pressure when tightening screws
- Break delicate parts while handling the PCB
The problem? These parts are so small that most customers never notice they’ve been damaged. But even a single missing component can prevent the GPU from powering on, displaying video, or running stably.
A Real Case: Nvidia 5090 Damaged by Wrong Screws
One of the most dramatic examples we’ve seen at ZapFixers was with an Nvidia RTX 5090. A customer installed a water-cooling system but used screws that were too long. Instead of holding the cooler securely, the screws went straight through the PCB and damaged multiple board layers.
This kind of damage can’t be fixed with simple cleaning or paste replacement—it requires advanced microsoldering and, in some cases, may be beyond repair. It’s a perfect reminder that even something as small as choosing the wrong screw length can destroy a multi-thousand-dollar GPU.
(We documented this repair in a video, which you can watch to see how easily this mistake happens.)
Other Common Mistakes When Servicing a GPU
Besides knocked-off components, other mistakes can cause a graphics card to fail after a DIY repair attempt:
- Using the wrong thermal paste or pads – applying too much, too little, or using low-quality materials can cause overheating.
- Forgetting thermal pads – missing pads lead to VRAM or VRM chips running dangerously hot.
- Improper screw tightening – overtightening can bend the PCB or crack solder joints.
- ESD (electrostatic discharge) – touching sensitive areas without proper grounding can damage the GPU instantly.
Signs Your GPU Was Damaged During Servicing
If your graphics card stopped working after you opened it, here are the most common symptoms:
- Fans spin, but no display signal
- GPU detected, but frequent crashes or artifacts
- Black screen on boot
- Burn marks, broken traces, or missing components visible on the PCB
How ZapFixers Can Help
At ZapFixers, we specialize in GPU diagnostics and microsoldering repair. With professional microscopes and soldering tools, we can:
- Detect missing or damaged components invisible to the naked eye
- Replace or resolder critical SMD parts
- Restore full functionality to graphics cards that stopped working after servicing
Many GPUs that appear “dead” can actually be revived with the right expertise.
Prevent These Problems: Let ZapFixers Handle Maintenance
Instead of risking permanent damage to your graphics card, you can let us handle the servicing safely. At ZapFixers, we offer:
- Professional GPU cleaning
- High-quality thermal paste replacement
- Thermal pad replacement with proper sizing and material
This ensures your GPU stays cool and performs at its best – without the risks of DIY mistakes.
Frequently Asked Questions (FAQ)
Yes, you can clean dust off your GPU’s cooler and fans with compressed air. But opening the card and touching the PCB is risky if you don’t have the right tools and experience. Many “dead after cleaning” GPUs we receive are damaged during this process.
Use a high-quality, non-conductive thermal paste designed for high-performance electronics. Avoid cheap or conductive pastes that can short nearby components. At ZapFixers, we only use premium thermal compounds tested for GPU use.
Yes. Thermal pads are just as important as thermal paste. They ensure proper cooling of VRAM and VRM chips. Forgetting or misplacing pads can lead to overheating and permanent damage.
Yes – thermal paste thickness is very important. Too much paste can overflow and insulate instead of transferring heat, while too little paste creates air gaps that trap heat. The goal is to apply a thin, even layer that makes full contact between the GPU die and the heatsink. At ZapFixers, we apply the correct thickness to ensure maximum cooling efficiency.
Typically every 3–5 years, depending on usage and temperature. High-performance or AI cards may need more frequent servicing.
In many cases, yes. If components were knocked off or damaged, they can often be replaced by a professional repair service like ZapFixers. Don’t throw your card away before getting it diagnosed.
Final Thoughts
If your GPU doesn’t work after you serviced it, the issue is often not the card itself but a missing or damaged component from handling. At ZapFixers, we see this problem daily and have the tools and skills to fix it. Better yet, by letting us handle cleaning, thermal paste, and pad replacement, you can keep your card in top shape without the risks of doing it yourself.