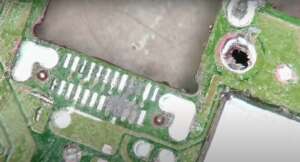
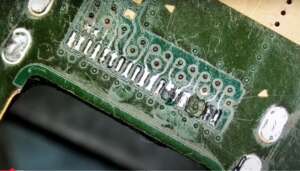
xbox hdmi port repair near me
Are you dealing with a black screen, flickering video, or “no signal” issues on your Xbox? You’re not alone. A damaged HDMI port is one of the most common problems that Xbox users face, especially with the Xbox One, Xbox One S, Xbox One X, and the newer Xbox Series X/S models. At ZapFixers, we specialize in professional Xbox HDMI port repair with convenient mail-in services available across all states. We bring your console back to life with fast, reliable, and affordable repairs, backed by expert diagnostics and genuine parts.
Symptoms of a Damaged Xbox HDMI Port
If your Xbox isn’t displaying correctly, the HDMI port may be the issue. Here are the most common symptoms:
❌ No Signal on TV or Monitor
This is the most obvious sign. When you connect your Xbox to a display but it reads “No Signal” or remains black, a faulty HDMI port is a likely culprit.
🔌 Loose or Wiggling Cable
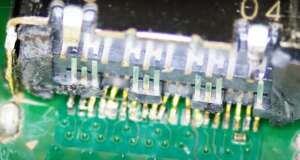
If the HDMI cable doesn’t sit firmly or wiggles easily in the port, there’s a good chance the port’s internal pins are bent or the solder joints have cracked.
🖥️ Flickering or Distorted Display
A partially damaged HDMI port may still send a signal—but it might flicker, display static, or shift colors randomly.
🧩 Sound But No Picture
Some users report hearing the Xbox menu sounds or startup chime, but the screen stays black. This can mean that audio is traveling through a different pathway while the video output is interrupted.
⚠️ Error Messages or Safe Mode Booting
Your console might boot into a low-resolution safe mode or display error codes indicating display connection issues.
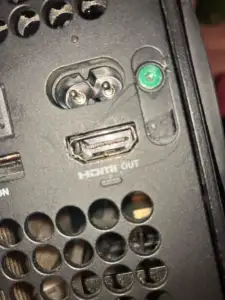
Common Causes of HDMI Port Damage
Knowing what causes HDMI issues can help you avoid future problems. Here’s what typically leads to HDMI failure on Xbox consoles:
👉 Forceful Cable Insertion or Removal
Kids, pets, or just a clumsy tug can cause serious damage to the delicate pins inside the HDMI port.
🎮 Moving the Console While Plugged In
Transporting or adjusting your Xbox while the cable is connected places stress on the port, breaking solder joints or bending pins.
🧲 Manufacturing Defects or Weak Solder
Some Xbox models (especially early versions of Xbox One S and Xbox Series X) have solder joints that can crack with repeated use.
🧹 Dust and Debris Buildup
Over time, dust can accumulate inside the HDMI port, affecting contact between the cable and the internal pins.
Challenges of Xbox HDMI Port Repair
HDMI port replacement on an Xbox isn’t a DIY job. Here’s why:
🔬 Precision Microsoldering Required
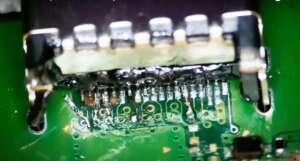
Replacing the port involves microsoldering—a process that requires a microscope, hot air station, and expert-level soldering skills. One mistake can permanently damage the motherboard.
🧠 Diagnostics Before Repair
A “no signal” issue may sometimes be due to faulty HDMI encoder chips (like the TDP158 on Xbox One X or S), ESD protection ICs, or damaged traces—not just the port itself. Proper diagnosis is essential.
🔥 Risk of Overheating the Board
The Xbox uses multilayer PCBs. Applying too much heat during repair can damage other nearby components or warp the board.
📦 Hard-to-Find Parts
OEM HDMI ports for Xbox consoles are model-specific and not always easy to source. Using incorrect or cheap third-party ports leads to repeat failures.
Our Expert Xbox HDMI Repair Process
At ZapFixers, we follow a proven step-by-step repair process to ensure the highest quality results.
Step 1: Free Diagnostics
We start with a full hardware and software diagnostic. We verify the issue, check for secondary damage, and confirm whether the HDMI port or other components (e.g., retimer chips or power circuits) are affected.
Step 2: Microsoldering and Port Replacement
If the port is damaged, we remove it using specialized hot air tools. Then, using high-quality OEM HDMI ports and leaded solder, we install the new port with precise alignment and solid solder joints.
Step 3: Multi-Point Inspection
We test HDMI signal integrity, inspect under the microscope for cold joints or solder bridges, and test all pins using a multimeter.
Step 4: Reassembly and Full Testing
We reassemble your console, test it with multiple displays and resolutions, and ensure that everything is working—video, audio, HDR output, and refresh rate compatibility.
Step 5: Clean and Return
Every console leaves our bench cleaned, repasted if necessary, and thoroughly tested. We even update the firmware if requested.
Why Choose ZapFixers?
There are plenty of places that claim to fix game consoles. But here’s what sets ZapFixers apart:
✅ Real Technicians, Real Tools
Our team includes certified microsoldering experts with years of experience in electronics repair—not just part-swappers.
⏱️ Fast Turnaround
We know you want your Xbox back fast. Most HDMI repairs are completed within 24–48 hours.
📍 Local & Convenient
We’re located in South Florida—serving Hollywood, Miami, Fort Lauderdale, and beyond. Drop-off, mail-in, and on-site options available.
🛠️ OEM-Quality Repairs
We use original HDMI ports or better, not cheap knockoffs. That means your repair lasts.
💰 Transparent Pricing
No hidden fees. We’ll give you a free quote and explain every step. Most Xbox HDMI repairs range between $89 and $129, depending on the model and damage level.
Challenges of Xbox HDMI repair
Rebuilding Connections: Microsoldering and Pad Repair
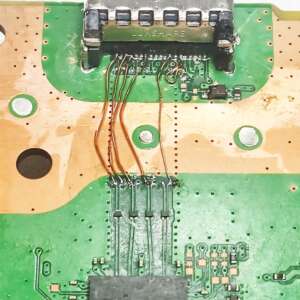
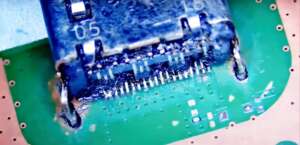
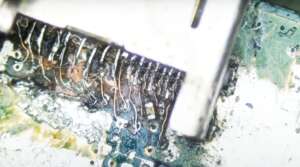
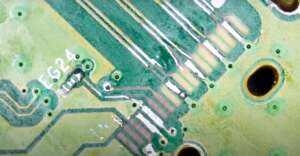
Repairing torn traces is a highly detailed task that demands precision microsoldering, the use of fine jumper wires, or reconstructing absent pads. This goes far beyond standard soldering—it’s intricate work that calls for skill, patience, and specialized equipment. Without the proper expertise, one wrong move can permanently ruin the circuit board.
The Multilayered Challenge: Xbox Board's High Thermal Mass
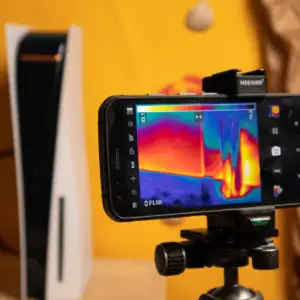
One of the challenges in repairing a Xbox HDMI port lies in the complexity of its motherboard. Built with multiple layers and high thermal mass, the board absorbs heat rapidly and unevenly. To safely desolder the faulty HDMI connector, the entire board needs to be evenly preheated. Skipping this step and applying intense heat to a single area risks warping the board or causing internal layer separation.
Not Your Average Solder Job: Why Preheating Is Crucial
A lot of DIY enthusiasts try to remove the HDMI port using a regular soldering iron, but quickly realize it’s not up to the task. The Xbox motherboard disperses heat so efficiently that conventional tools simply can’t keep up. To do the job right – and safely – you need a quality hot air rework station, a preheater, and carefully controlled thermal settings. Without them, there’s a high risk of damaging the board or pulling up delicate pads.
The Risk of Collateral Damage: Tiny Components at Risk
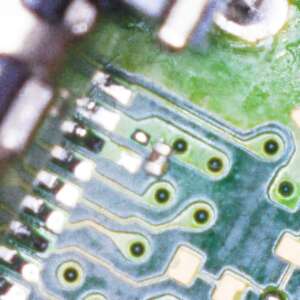
The Xbox motherboard contains thousands of tiny, microscopic components packed tightly together, making DIY HDMI port repair extremely challenging. One wrong move can easily damage nearby circuits or components, turning a simple fix into a much bigger problem. Precision tools and expert technique are essential for a successful repair.
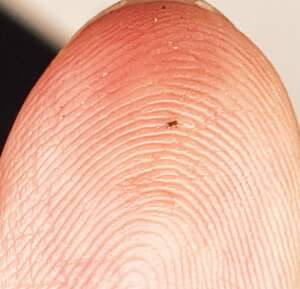
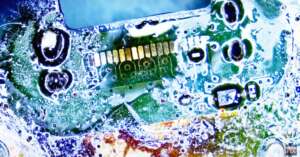
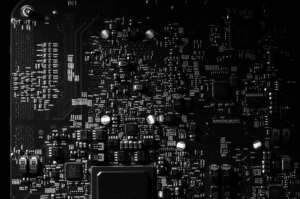
Can you spot the capacitor in this photo? It’s the size of a fingerprint groove!
Signal Integrity Matters: It's Not Just About Soldering
Even after installing a new port, HDMI signals must travel cleanly through the data lines, including TMDS and DDC channels. These high-speed differential pairs are sensitive to interference and poor soldering. Diagnosing issues may require oscilloscopes or advanced multimeters, not just a simple visual inspection.
Leave XBOX HDMI Repairs to the Pros
In short, HDMI repair on a XBOX is far from a plug-and-play task. It demands specialized tools, extensive experience, and deep knowledge of board-level electronics. Without proper equipment like a microscope, hot air station, preheater, and soldering expertise, you’re far more likely to cause additional damage than achieve a successful fix. This is one job best left to professional microsoldering technicians who do this work every day.
About ZapFixers – Mail-in Electronics Repair Experts
ZapFixers is more than just a repair shop—we’re your neighborhood tech experts. Our team has years of hands-on experience in:
-
Microsoldering and chip-level repairs
-
Console and computer motherboard repair
-
Custom cooling and thermal upgrades
-
Advanced diagnostics and component-level troubleshooting
We’ve repaired hundreds of Xbox consoles for customers across Hollywood, Fort Lauderdale, and Miami. Whether it’s your HDMI port, disc drive, or power supply – we’ll fix it.
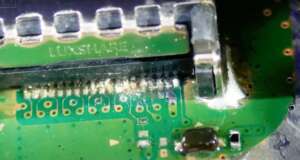
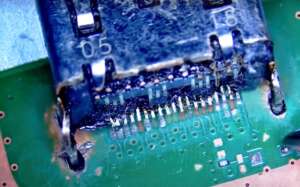
When Repairs Go Wrong: HDMI Port Fails from DIYers and Shops
FAQ
At Zapfixers we charge $99 for Xbox HDMI port replacement or repair.
You can send it to us, at Zapfixers we specialize in HDMI port repairs.
We can fix it for you. Just send it to our lab, and we will take care of it all.
Unfortunately, a good permanent fix involves replacing the entire port, a complex process requiring soldering skills. If you lack confidence in this area, consider sending your Xbox to us for professional repair.
The easiest way is to send your Xbox to our professional service. We will take care of it.
Fixing an HDMI port is next to impossible. You can attempt to replace the HDMI port; however, this requires soldering equipment, knowledge, and skills. We encounter dozens of unsuccessful repair attempts from customers, which often necessitate more work to resolve.
The cost range for other repair shops is ranging from $140 to $200. We charge $99 for HDMI port replacement.
We offer a same day repair, one of the fastest in the market.
- Physical Impact: Accidental hits or dropping devices with HDMI ports can cause damage.
- Bent or Broken Pins: Inserting cables at an angle, using excessive force, or improper removal can lead to bent or broken pins inside the HDMI port.
- Constant Plugging and Unplugging: Frequent connecting and disconnecting of HDMI cables may wear down the port over time.
- Manufacturing Defects: Some devices may have inherent defects in the HDMI port, making them more susceptible to damage.
- Overheating: Excessive heat can weaken solder connections within the HDMI port, leading to malfunction.
- Liquid Exposure: Spills or exposure to liquids can corrode the internal components of the HDMI port.
- Cable Connection: Ensure the HDMI cable is securely connected to both the PS5 and the TV. Try using a different cable to rule out cable issues.
- Port Issues: Check for any damage or debris in the HDMI port on both the PS5 and the TV. A damaged port or obstructed connection can lead to problems.
- Resolution Settings: The PS5 may be set to a resolution unsupported by your TV. Boot the PS5 in Safe Mode and adjust the resolution settings.
- Power Cycle: Power off both the PS5 and the TV. Unplug them for a few minutes, then reconnect and power on.
- System Software Update: Ensure your PS5 has the latest system software updates, as these updates may include fixes for HDMI-related issues.
- Hardware Faults: If the above steps don’t resolve the issue, there may be a hardware problem with either the HDMI port on the PS5 or the TV. Consider professional inspection or contacting Sony support for assistance.
The HDMI port on a PS4 can be relatively fragile, and it may be susceptible to damage if not handled carefully. Common reasons for HDMI port damage on a PS4 include:
- Inserting or Removing Cables Incorrectly: Applying excessive force, inserting the cable at an angle, or yanking the cable out without pressing the release tab can lead to damage.
- Physical Impact: Dropping the PS4 or subjecting it to physical impact can result in damage to the HDMI port.
- Bent or Broken Pins: Mishandling the HDMI cable can cause the pins inside the port to bend or break, affecting connectivity.
- Constant Plugging and Unplugging: Frequent plugging and unplugging of the HDMI cable may wear down the port over time.
To avoid damaging the HDMI port, it’s crucial to handle the cables with care, insert and remove them properly, and ensure that the PS4 is placed in a secure location to prevent physical impact.
Yes, HDMI ports can experience burnout, although it’s relatively uncommon. Burnout in HDMI ports may occur due to various reasons:
- Electrical Overload: Excessive electrical current flowing through the HDMI port can cause burnout. This can happen if there is a power surge or if the connected device is faulty.
- Overheating: Prolonged exposure to high temperatures can weaken the solder connections within the HDMI port, leading to burnout.
- Manufacturing Defects: In some cases, manufacturing defects or poor-quality materials may contribute to the port’s vulnerability to burnout.
- Faulty Devices: Connecting a malfunctioning or defective device to the HDMI port can result in electrical issues that may lead to burnout.
While HDMI port burnout is not a common occurrence, it’s essential to follow best practices, such as using surge protectors, ensuring proper ventilation to prevent overheating, and avoiding connecting faulty devices to protect the HDMI port from potential damage.
To determine if your HDMI cable is damaged, you can look for the following signs:
1. **Visual Inspection:**
– Check the cable for any visible physical damage, such as cuts, frayed edges, or bent connectors.
– Ensure the connectors at both ends are not bent, broken, or misshapen.
2. **Intermittent Connectivity:**
– If you experience intermittent or flickering signals on your display, it could indicate a cable issue.
3. **No Signal or Poor Quality:**
– If your display shows “No Signal” or the quality is poor, it might be due to a faulty cable.
4. **Testing with Another Cable:**
– Try using a known working HDMI cable to see if the issue persists. If the new cable works, it suggests a problem with the original cable.
5. **Check for Bent Pins:**
– Inspect the HDMI ports on both the source device (e.g., gaming console) and the display (e.g., TV) for any bent or broken pins.
6. **Borrowing a Cable:**
– Borrow an HDMI cable from a friend or family member to test if the issue is related to the cable.
If you notice any physical damage, it’s advisable to replace the cable. Additionally, testing with a different cable can help identify whether the problem lies with the cable or other components in the setup.
Yes, consistently unplugging and plugging the HDMI cable is a detrimental practice. It can lead to physical wear on the HDMI port or the TV port, resulting in unreliable connectivity or permanent damage to both. On the other hand, leaving the cable connected does not pose a risk of damaging the TV’s electronics.
If your PS5 is plugged in but there is no signal on your display, several factors could be causing the issue. Here are some troubleshooting steps to help you identify and resolve the problem:
1. **Check HDMI Connection:**
– Ensure that the HDMI cable is securely connected to both the PS5 and the TV or monitor. Try using a different HDMI cable to rule out cable issues.
2. **Verify Power Connection:**
– Make sure the PS5 is powered on and that the power cable is securely connected. Check for any indicator lights on the console.
3. **Try Different HDMI Port:**
– If your TV or monitor has multiple HDMI ports, try plugging the PS5 into a different port.
4. **Test on Another Display:**
– Connect the PS5 to a different TV or monitor to see if the issue persists. This helps determine whether the problem is with the console or the display.
5. **Adjust Resolution Settings:**
– Boot the PS5 in Safe Mode and adjust the resolution settings. Incompatible resolution settings may cause a “no signal” issue.
6. **Inspect for Physical Damage:**
– Check the HDMI port on the PS5 for any bent or damaged pins. Inspect the HDMI port on the TV or monitor as well.
7. **Update System Software:**
– Ensure that your Xbox has the latest system software updates. Update the software if needed.
8. **Power Cycle:**
– Power off the Xbox and the TV. Unplug both devices for a few minutes, then reconnect and power on.
If the issue persists after trying these steps, there may be a hardware problem with the Xbox or the display. In such cases, consider reaching out to Sony support for further assistance or contact us for professional repair services.
